Set iTerm badges from command line
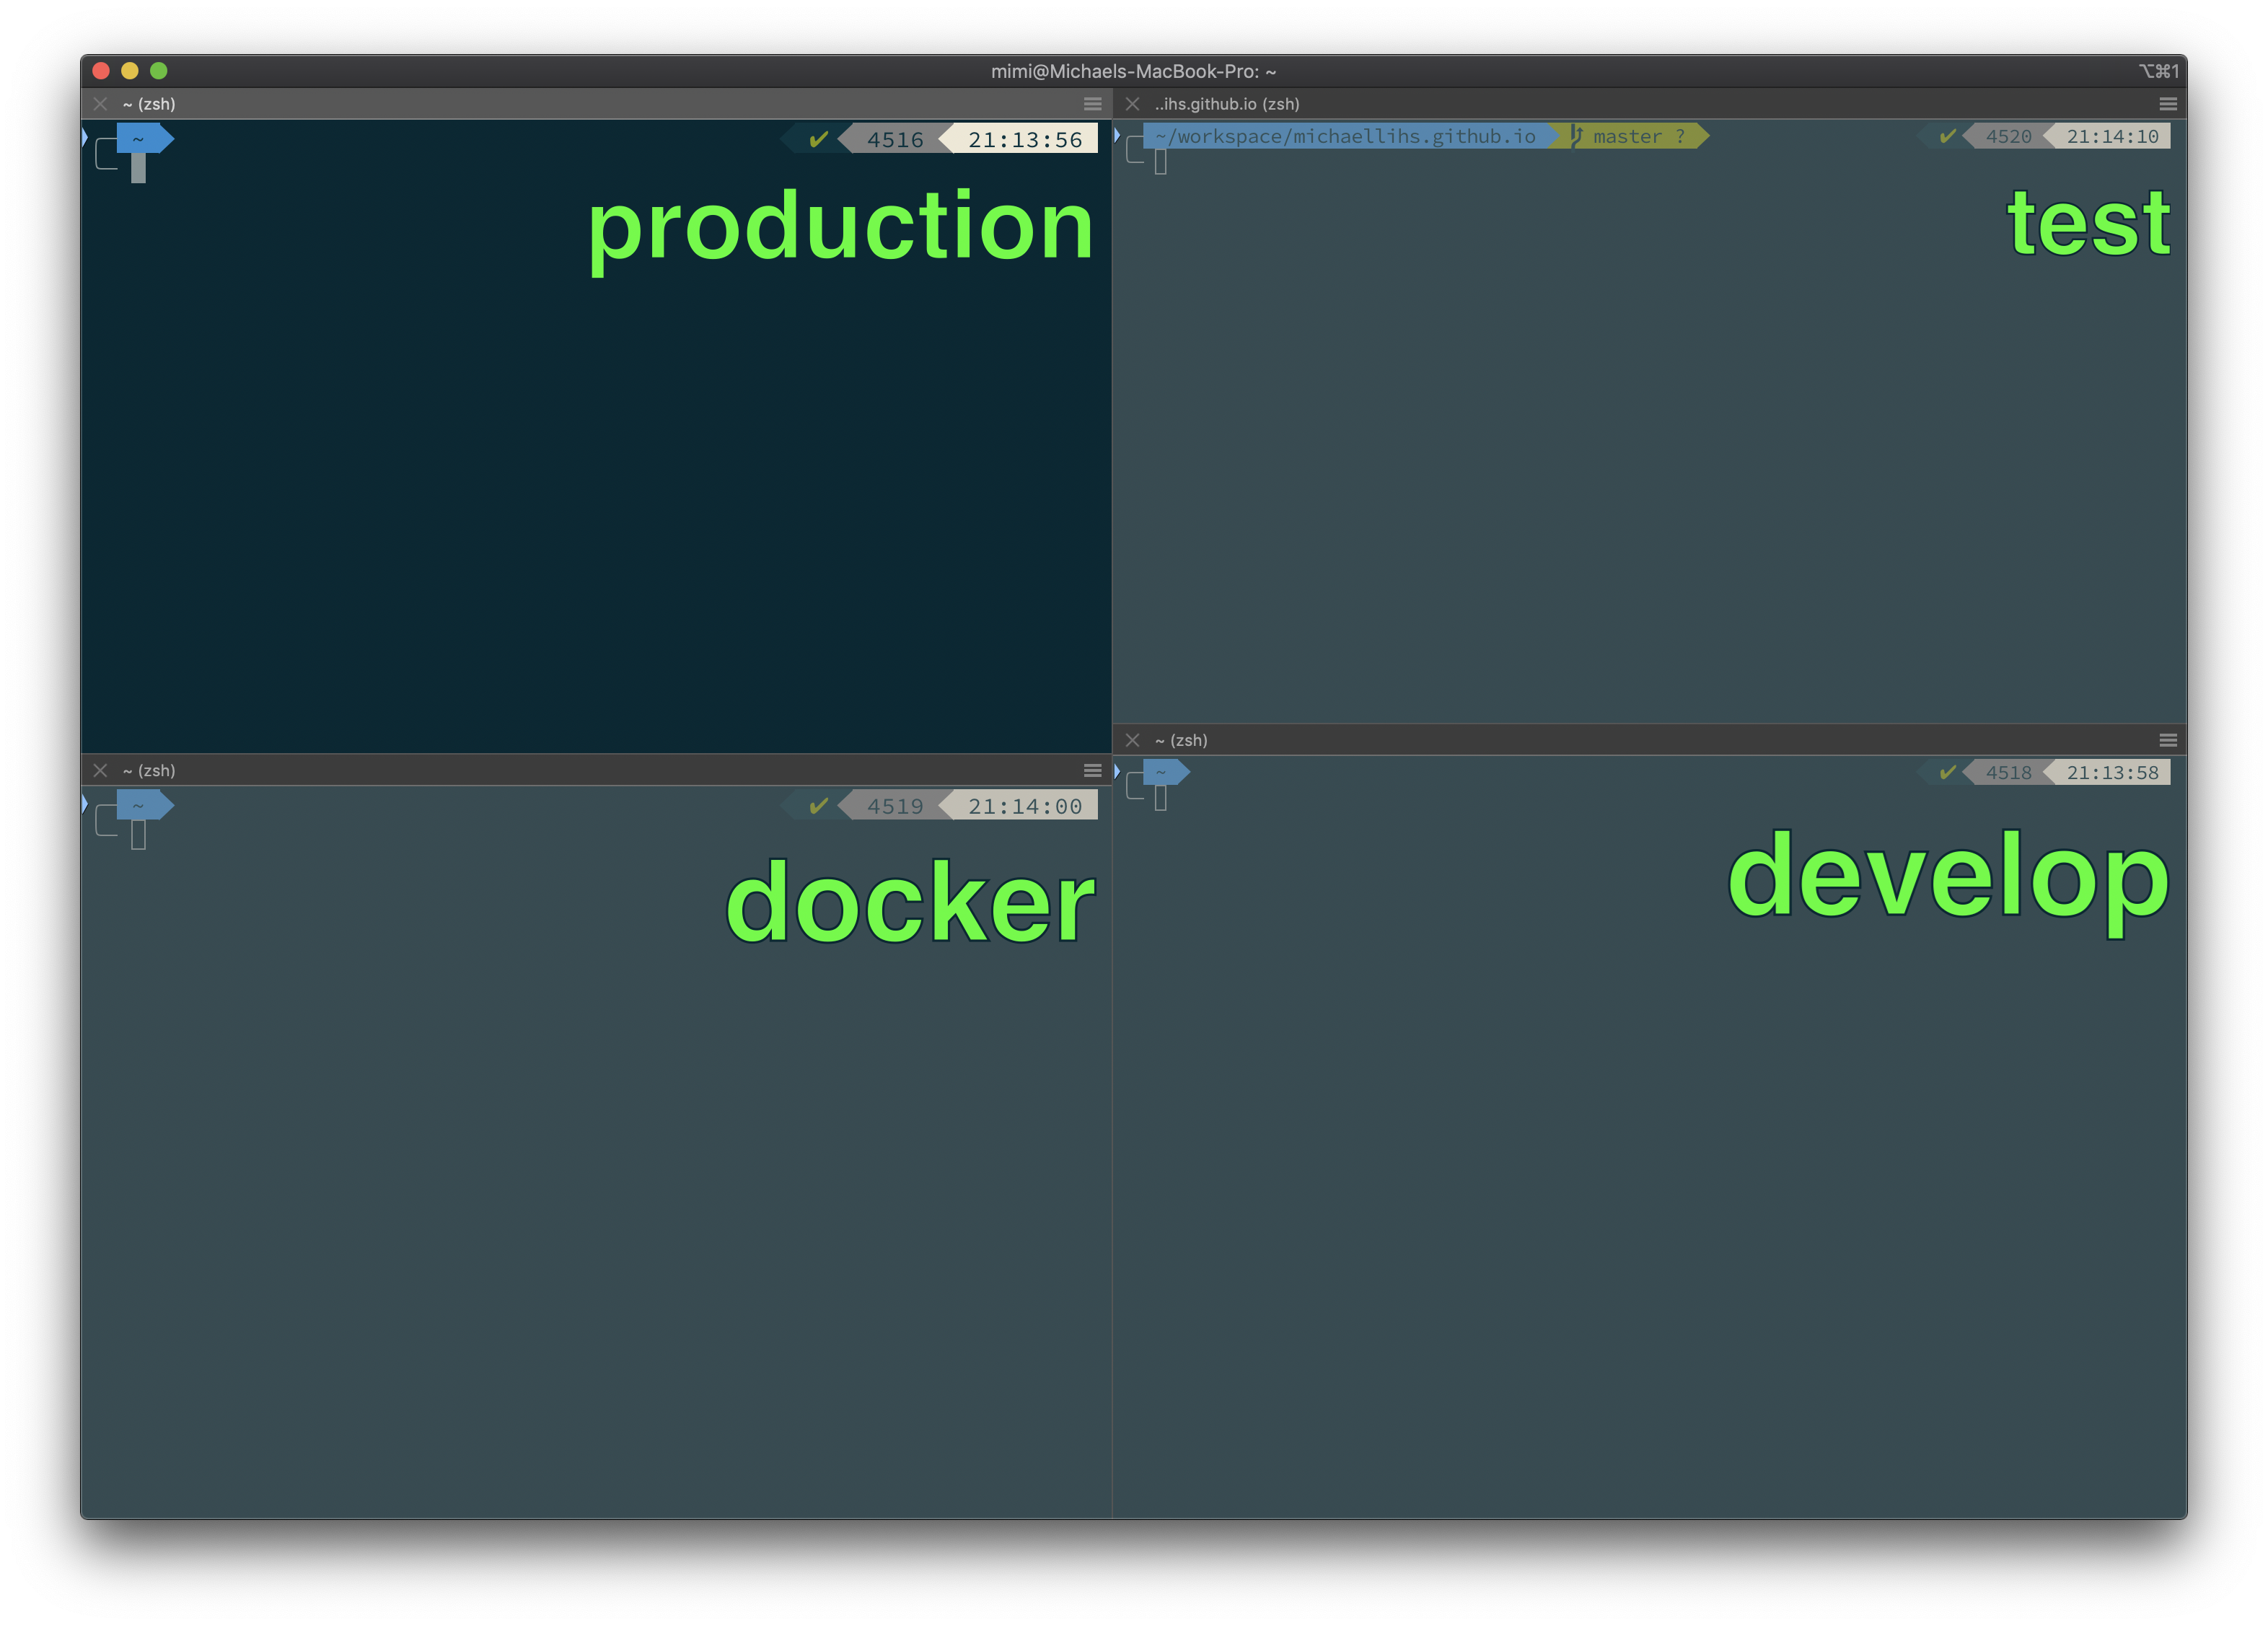
When working with multiple terminal windows, it is sometimes useful to have some kind of heading that indicates what each terminal contains. During our last showcase, we used this to let the audience know what each of our three terminal windows is showing.
Here is a short tutorial on how to set this up, so that you can set the badge easily from the command line. We assume that you are using iTerm on a Mac.
-
Install the iTerm shell integration - if you are using bash, here is all you need to run
curl -L https://iterm2.com/shell_integration/install_shell_integration.sh | bashthis will add some includes into your
~/.bash_profile. The website contains explanations for other shells as well (e.g.zsh) -
Add the following function to your
~/.bash_profile(or~/.zshrc)function iterm2_print_user_vars() { iterm2_set_user_var badge $badge }thereby you set a iTerm user var
badgethat reads the content from the$badgeshell variable. -
reload your shell profile via
source ~/.bash_profile -
In your iTerm profile settings, set
\(user.badge)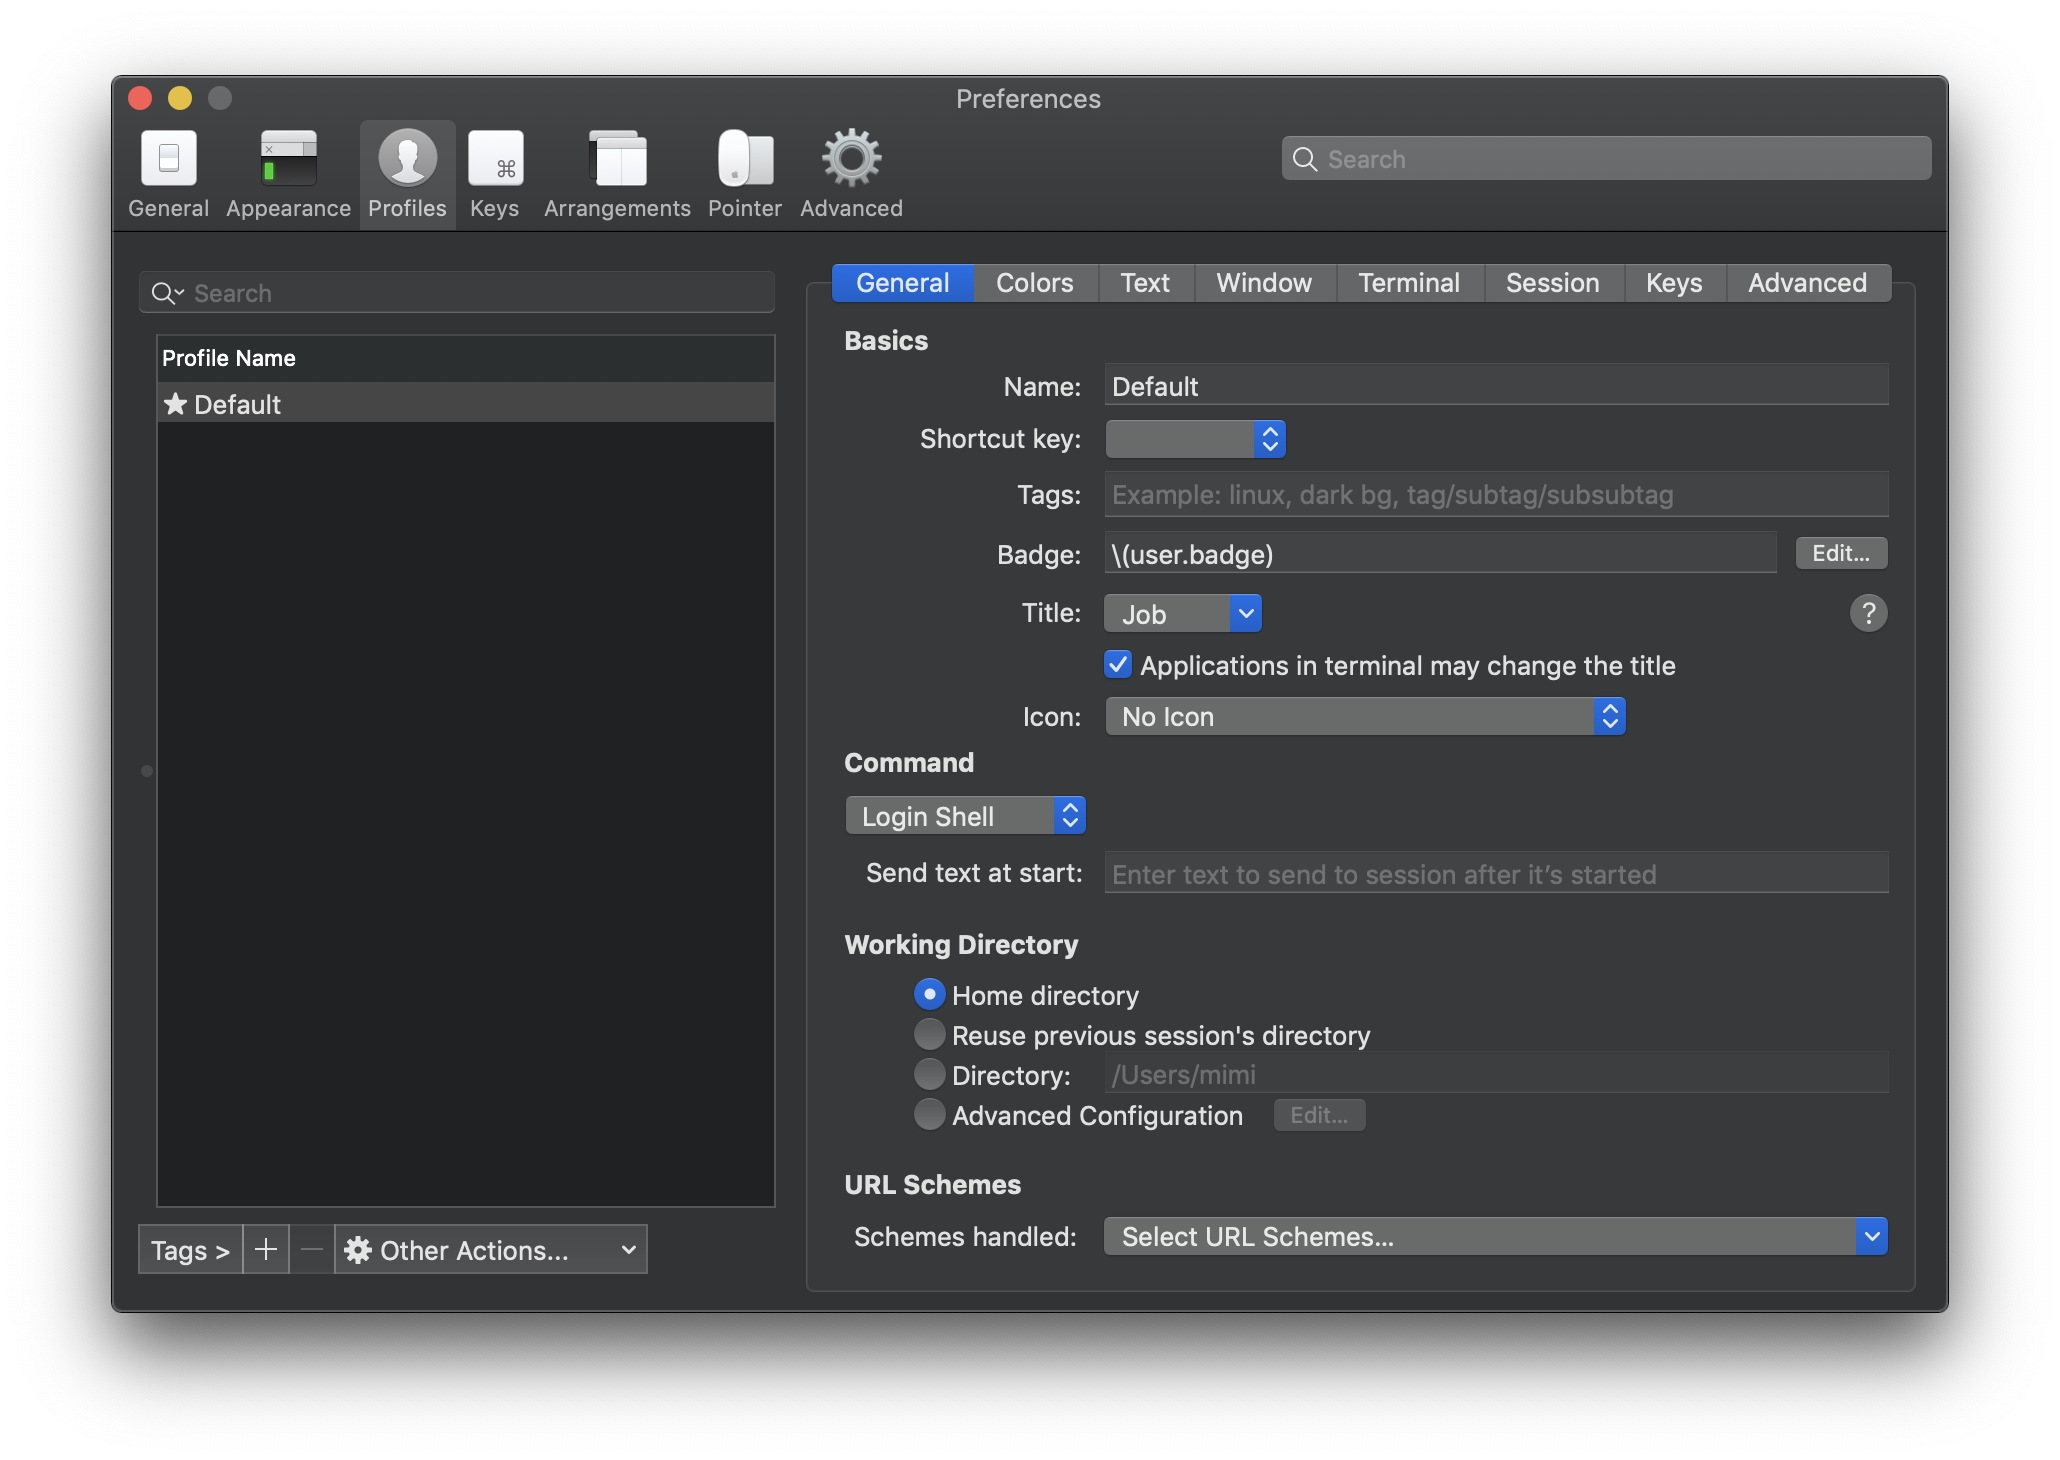
-
You can now set your badge in your terminal via
export badge='hello badge'
Have fun!
Further References
- https://technology.customink.com/blog/2016/07/18/how-to-add-badges-to-iterm2/